How to Add Asset Inventory in QuikChex HRMS
The Asset Inventory feature in QuikChex HRMS helps organizations maintain a centralized record of all company assets. It enables administrators to track asset details, monitor asset availability, manage employee assignments, and maintain Warranty and AMC information.
The system supports three types of asset categories:
- Physical Asset – Tangible assets such as laptops, desktops, monitors, mobile phones, printers, furniture, and other office equipment.
- Software Asset – Licensed software, applications, subscriptions, and software products assigned to employees or departments.
- Digital Asset – Non-physical digital resources such as digital certificates, domain names, cloud resources, digital licenses, and other electronic assets.
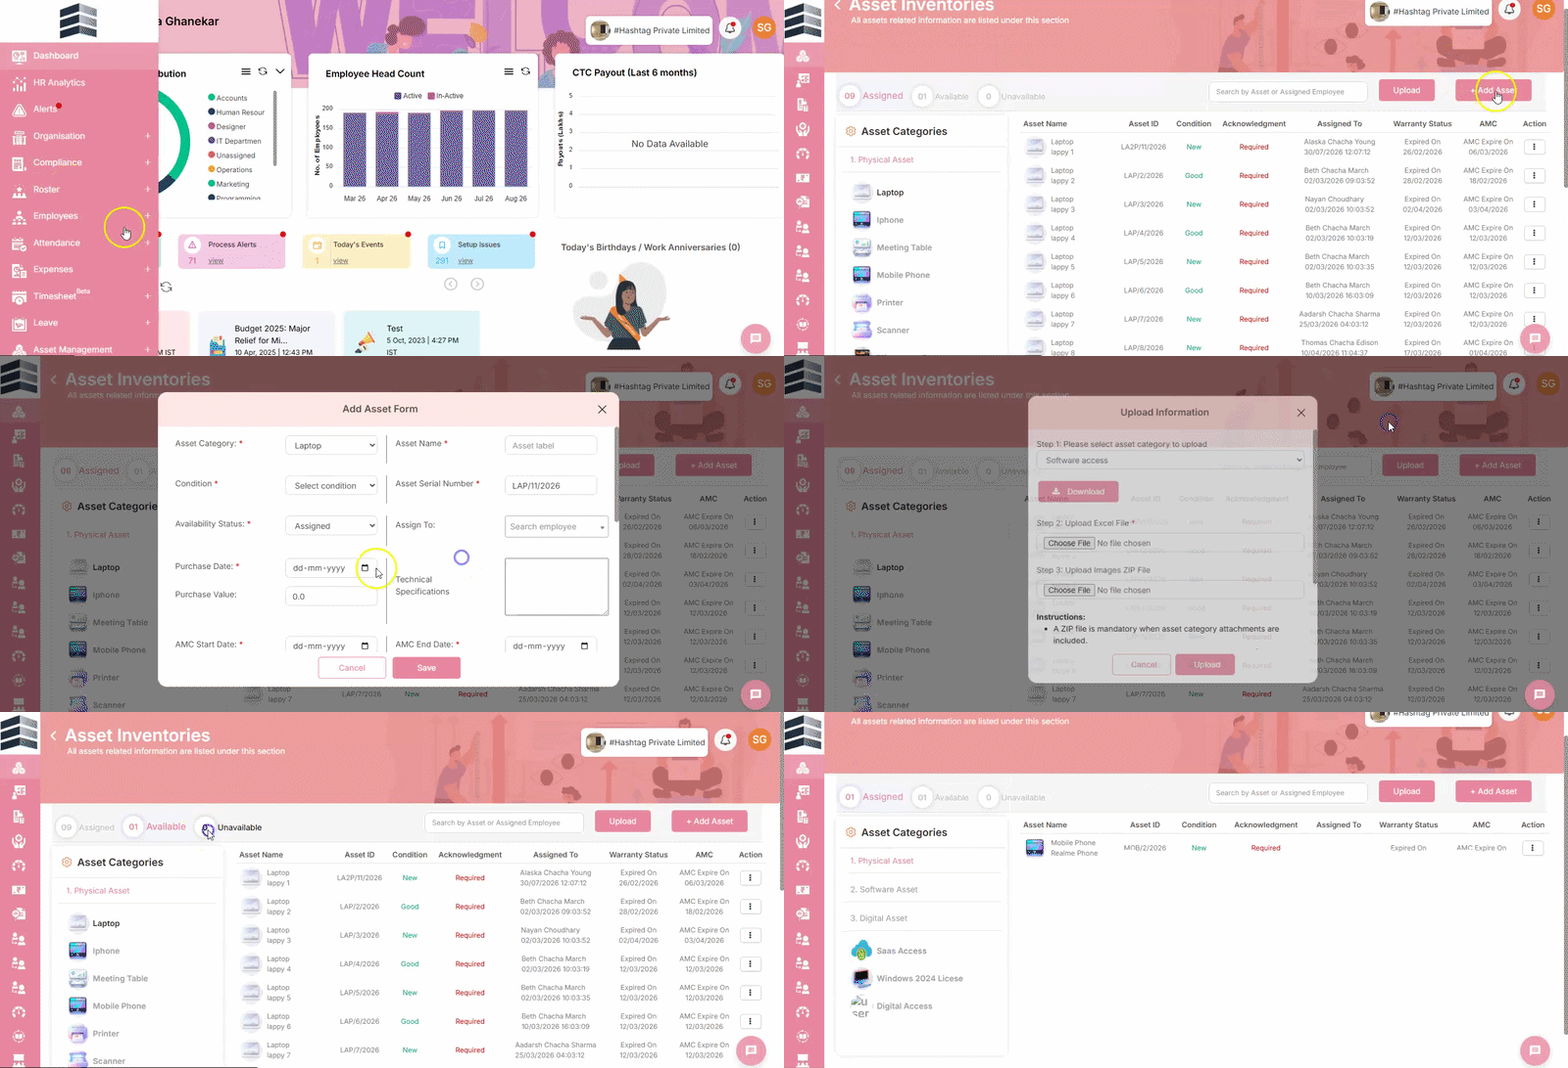
To access the Asset Inventory, navigate to the Asset Management module and click Asset Inventory.
The Asset Inventory page displays all the assets available in the system along with the following details:
- Asset Name
- Asset ID
- Asset Condition
- Acknowledgement Status
- Assigned Employee
- Warranty Status
- AMC Status
You can also perform the following actions for each asset:
- View asset details
- View asset assignment history
- Unassign an asset
- Update the asset condition
- Edit asset details
Adding an Asset
To add a new asset:
- Click Add Asset.
- Enter the following details:
- Asset Category
- Asset Name
- Asset Condition
- Asset Serial Number
- Asset Availability (Available/Unavailable)
- Assigned Employee (if the asset is already allocated)
- Purchase Date
- Purchase Value
- AMC Start Date
- AMC End Date
- Warranty Start Date
- Warranty End Date
- Asset Location/Branch
- Comments (if any)
- Attach supporting documents, such as the Purchase Invoice or Purchase Order (PO), if required.
- Click Save to add the asset to the inventory.
Bulk Upload of Asset Inventory
If you want to add multiple assets at once:
- Click Upload.
- Select the Asset Category for which you want to upload the inventory.
- Download the Excel Template.
- Enter the required asset details in the downloaded template.
- Review the instructions provided in the template or ZIP file to ensure the data is entered in the correct format.
- Upload the completed Excel file to import all the asset records into the system.
Note:
- Ensure that each Asset Serial Number is unique.
- Enter the data in the prescribed Excel Template format to avoid upload errors.